
How to Record an Online Course : The Expert Guide to High-Conversion Video (2026)
How to Record an Online Course : The Expert Guide to High-Conversion Video
Key Takeaways for 2026 Creators
-
Human Connection is King : audiences in 2026 reject overly polished, "AI-feeling" scripts. Be yourself.
-
Audio Trumps Video : students will tolerate grainy 1080p video, but they will quit if your audio is echoey or thin.
-
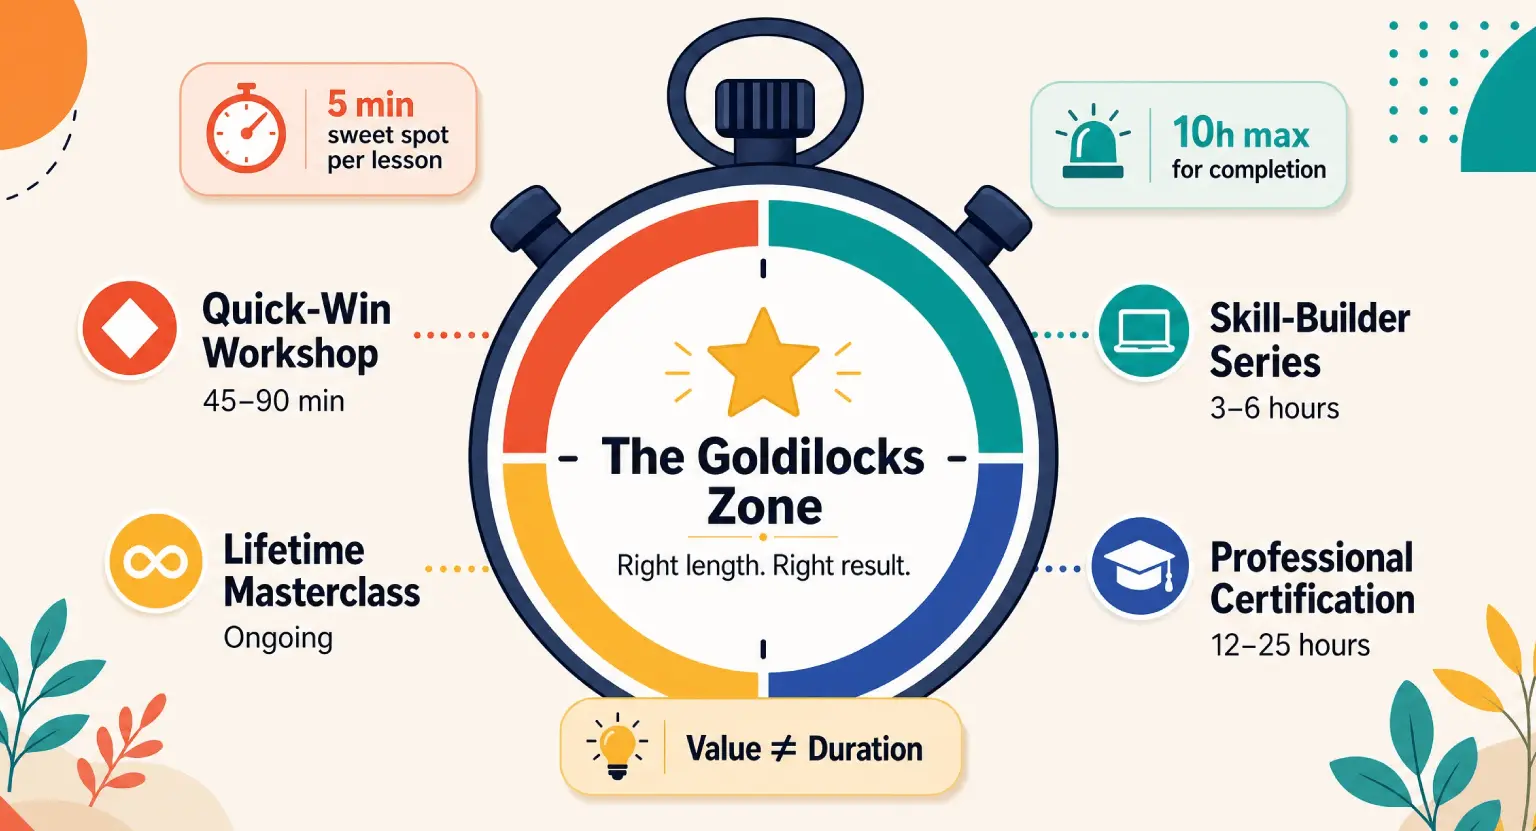
Modular Recording : keep lessons under 7 minutes to match the modern attention span.
-
Contextual Planning : use a solid how to structure an online course strategy before you ever touch a camera.
-
Interactive Hooks : record specific segments designed for mid-video interaction.
It's 2026, and if you're still trying to record an online course the way people did in 2020, you're likely going to struggle.
The market is smarter now. People can spot a low-effort production from a mile away, and frankly, they've grown tired of the "talking head against a blank white wall" aesthetic.
They want to feel like they are in the room with you. But don't let that scare you off.
Recording a world-class course actually got easier because the tools have become more intuitive, even if the standards for "quality" have shifted toward authenticity over perfection.
So, let's break down how you can record something that doesn't just sit on a server but actually changes lives and builds your business.
The Blueprint : Planning Before the "Rec" Button
You might want to jump straight into buying a camera, but that's a trap. Every hour you spend in pre-production saves you three hours in the editing booth.
You need a script, or at the very least, a very detailed bullet-point outline. But here's the 2026 twist : don't read your script word-for-word.
People want the "uhms" and the natural pauses. It makes you feel human.
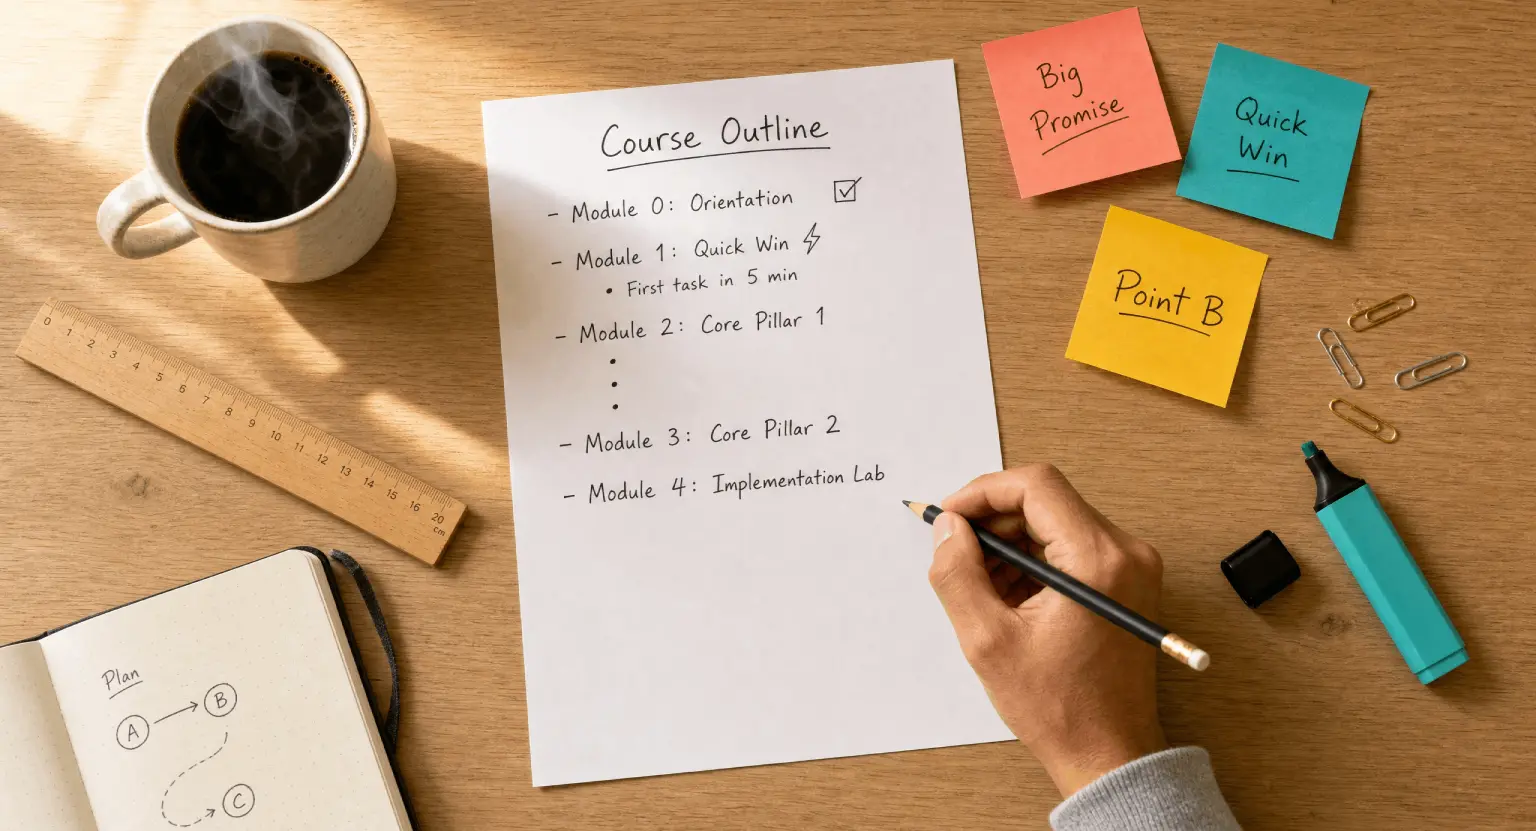
If you're struggling with what to teach, first look at some profitable online course ideas to ensure there is actually a market for your knowledge. Once the topic is locked, visualize the student's journey through each module.
And speaking of modules, think small. The most successful courses this year are "micro-courses" or modular systems where no single video exceeds the ten-minute mark. When you're planning your recording session, group your lessons by "vibe."
Are these the high-energy introductory videos?
Or the deep-dive technical tutorials?
Record similar styles in batches so your energy levels stay consistent across the curriculum.
This batching method isn't just about saving time; it's about maintaining a psychological flow that the viewer can feel.
If you're jumping between topics, your voice and body language will reflect that frantic energy, which isn't great for a learning environment.
Before you finalize your plan, do a "tech-run" of your slides or screen shares. Nothing kills a recording flow faster than realizing your software crashed or your presentation font is unreadable on mobile devices.
Remember, over 70% of your students are probably watching you on a smartphone. Check your visuals for mobile responsiveness before you commit to the recording.
This means larger text, high-contrast colors, and avoiding tiny details that get lost on a 6-inch screen.
It's these small details that separate the amateurs from the true experts in the digital space.
Selecting Your 2026 Tech Stack
Gear used to be the biggest barrier to entry, but now, the "best" equipment is often what you already have in your pocket - with a few vital upgrades. Most modern smartphones have sensors that rival mirrorless cameras from five years ago.
However, if you want that professional shallow depth-of-field (the blurry background), a dedicated mirrorless camera with a 35mm or 50mm lens is still the gold standard.
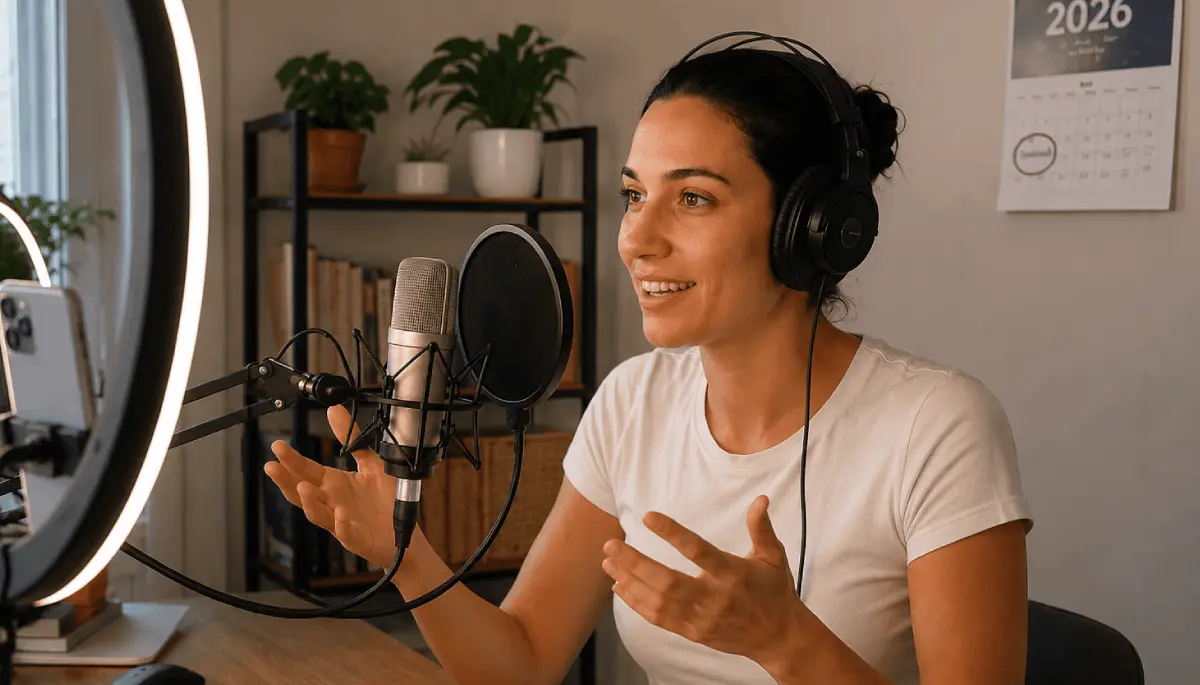
But let's talk about the real hero : the microphone. In 2026, we are seeing a massive shift toward spatial audio and ultra-crisp USB-C condenser mics.
If your audio sounds like you're in a bathroom, your course is dead on arrival.
So, what should you actually buy? You don't need a $10,000 cinema rig. You need a reliable 4K camera (or a 2025/2026 flagship phone), a sturdy tripod, and a dedicated audio interface.
Look into the best equipment for recording online courses to see the current rankings of what's working. And don't forget lighting.
Three-point lighting - the key light, fill light, and back light - remains the industry standard for a reason.
It adds dimension to your face and separates you from the background. Even a cheap pair of LED panels can make a $500 webcam look like a $2,000 setup if you position them correctly.
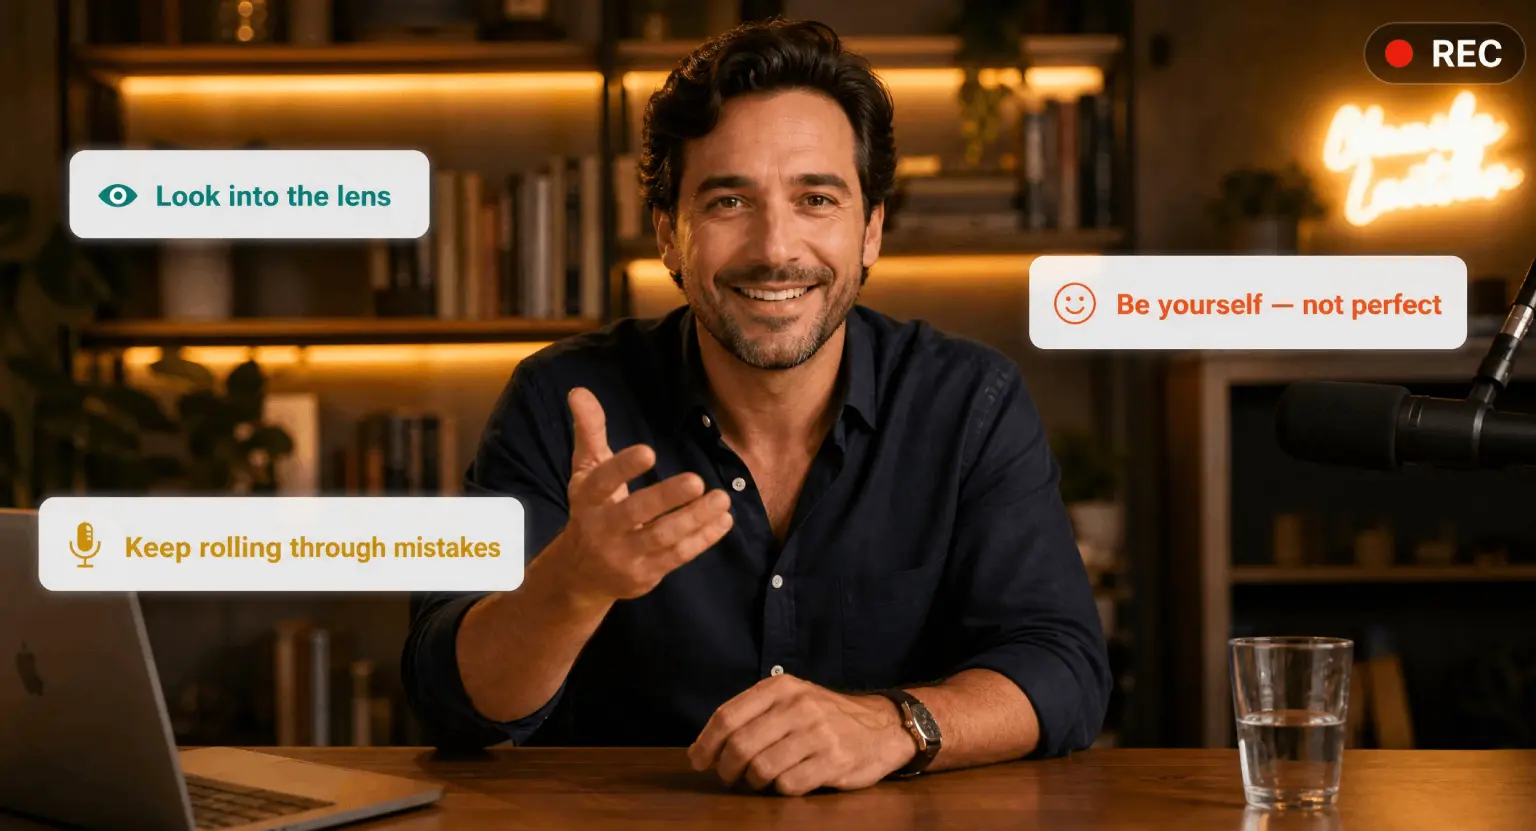
Teleprompters have also become a lot more accessible. Even if you aren't reading a script, having your key talking points reflected over the camera lens ensures you maintain eye contact with the student. In 2026, "eye-tracking" is a huge part of perceived authority.
When you look into the lens, you aren't looking at glass; you're looking into the eyes of your student. That connection is what builds trust. If you're constantly glancing down at notes, you lose that bond.
High-tech or low-tech, make sure your setup allows you to keep your focus on the audience throughout the entire recording session.
Setting the Stage : Environment and Atmosphere
Your recording space is a character in your course. It tells a story about your brand. In the past, people loved the "office" look, but today, "lifestyle" setups are performing much better.
This means a clean, curated corner of a room with some plants, some books, and maybe a soft neon sign or a warm lamp in the background.
It feels accessible. But beyond the aesthetics, your environment needs to be acoustically treated. Soft surfaces are your best friend. Rugs, curtains, and even pillows hidden out of frame can stop sound waves from bouncing off hard walls and creating that annoying echo.
-
Soundproofing Basics : throw a heavy rug on the floor even if you have carpet. It helps more than you think.
-
Visual Depth : don't sit directly against a wall. Pull your desk out so there's 3-5 feet of space behind you.
-
Consistent Lighting : close your curtains. Natural light changes every 10 minutes as clouds pass, making your video impossible to edit for consistency.
-
Distraction Management : turn off your fridge, your AC, and tell your family to give you a "red light" window of silence.
-
Backup Power : 2026 gear is power-hungry; ensure your laptop and camera are plugged into a surge protector, not running on battery.
The "energy" of the room matters too. If the room is cluttered and messy, you'll feel cluttered and messy. Clear the physical space around your camera so you have room to move your hands and express yourself.
I always suggest having a tall glass of water (no ice, it clinks!) and some lip balm nearby. These sounds and physical comforts might seem trivial, but they prevent "dry mouth" sounds that are a nightmare to edit out later.
Your goal is to create a "cocoon" of focus where you can deliver your best performance without worrying about the world outside that door.
The Recording Session : Performance Secrets
Now, let's get into the actual act of recording. The biggest mistake most new creators make is trying to be "The Professional Version" of themselves.
They stiffen up, their voice goes up an octave, and they sound like a robot reading a manual.
Stop it. Imagine you're at a coffee shop explaining your passion to a friend.
That's the tone that wins in 2026. Smile more than you think you need to.
On camera, a "neutral" face often looks bored or angry. A slight lift in your expression translates to warmth and engagement on the other side of the screen.
When you mess up - and you will mess up - don't stop the recording. Just pause, take a breath, and repeat the last sentence.
This makes the editing process so much easier because you can see the "silent gaps" in the audio wave, which act as visual markers for where to cut.
If you stop and restart every time you flub a word, you'll lose your momentum and end up with a fragmented, low-energy video.
Just keep the "tape" rolling. Some of my best teaching moments came right after a mistake because I was relaxed and laughed it off, which made me more relatable to the students.
Also, vary your delivery. Use "The Change Principle." Every 2-3 minutes, change something visually or audibly. Lean in for a "secret" or a high-importance point. Use a screen overlay. Transition from a talking head to a slide.
This prevents the viewer's brain from going into "autopilot" mode. In the world of 2026, your biggest competitor isn't another course creator; it's the "back" button and the social media notification. You have to earn their attention every single minute.
Be dynamic, be rhythmic, and don't be afraid to show some personality.
Comparison : Choosing Your Recording Method
Not all courses are recorded the same way. Depending on what you're teaching, your "style" will change.
Here's a quick breakdown of the most common recording formats we see today and how they stack up.
| Recording style | Difficulty | Best for... | Tech required |
|---|---|---|---|
| Pure Talking Head | Medium | Soft skills, mindset, storytelling. | Camera, mic, three-point lighting. |
| Screen Share + Webcam | Low | Software tutorials, coding, design. | Screen recording software, webcam. |
| The "Over-the-Shoulder" | High | Physical crafts, cooking, hardware repair. | Top-down camera rig, high-intensity lights. |
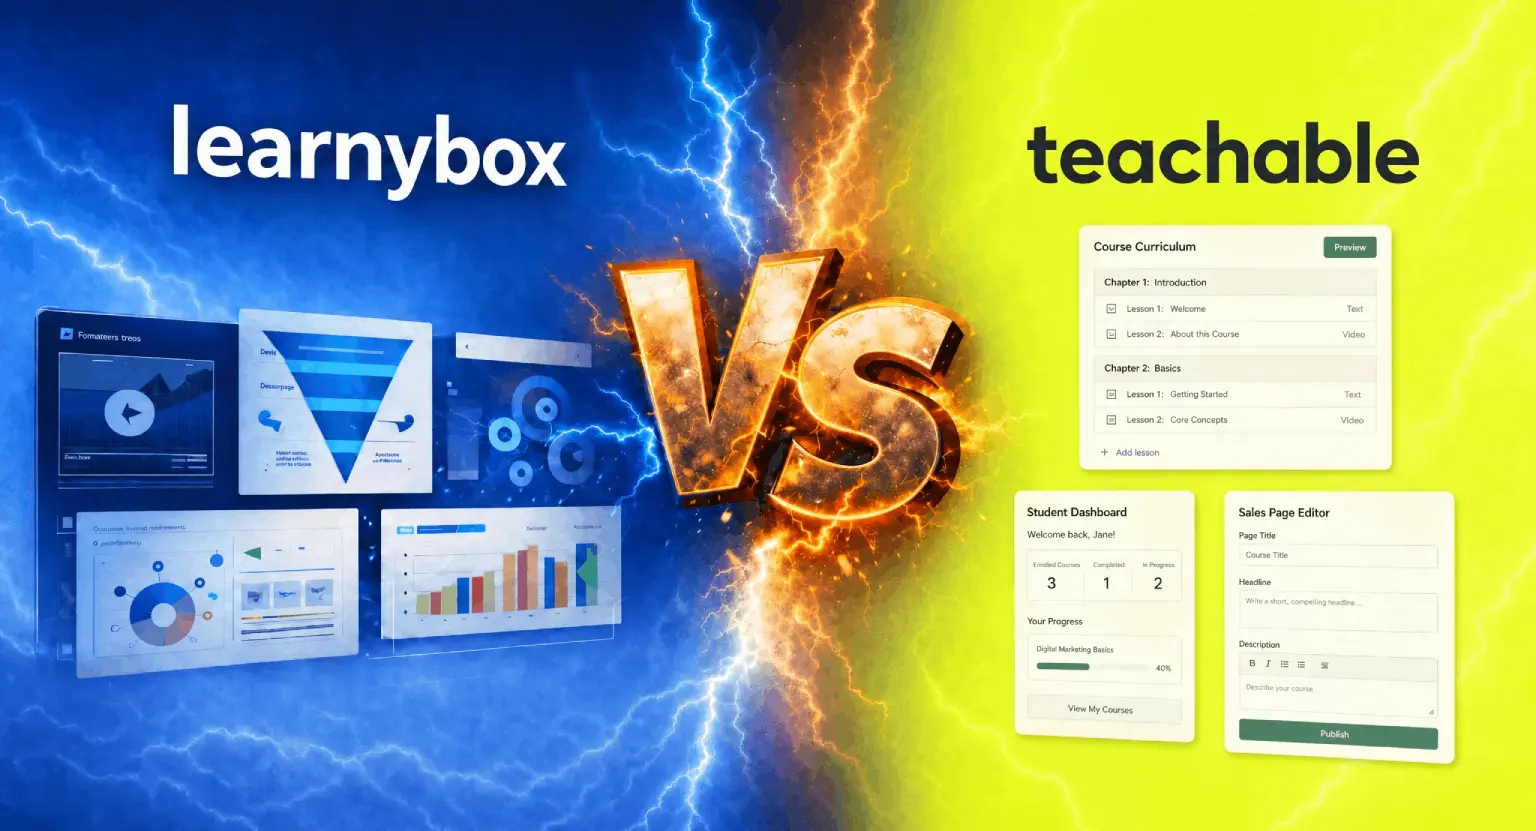
| The Interactive Workshop | Medium | Coaching groups, high-ticket programs. | Live streaming setup, LearnyBox demo tools. |
| AI-Enhanced Avatar | Variable | Quick updates, faceless niche channels. | Generative video software (use with caution). |
Post-Production and Hosting Your Masterpiece
Once you have your raw footage, the real magic happens in the edit. But here's a tip : don't over-edit. In 2026, people appreciate a "long-form" feel that hasn't been sliced into a million pieces by aggressive jump cuts.
Use cuts to remove dead air and mistakes, but let the natural rhythm of your speech shine through. Add B-roll (supplemental footage) or text overlays when you mention a key term or a complex concept.
This aids visual learners and keeps the video from feeling static. If you're talking about a specific platform, this is the time to show a screenshot or a quick clip of it in action.
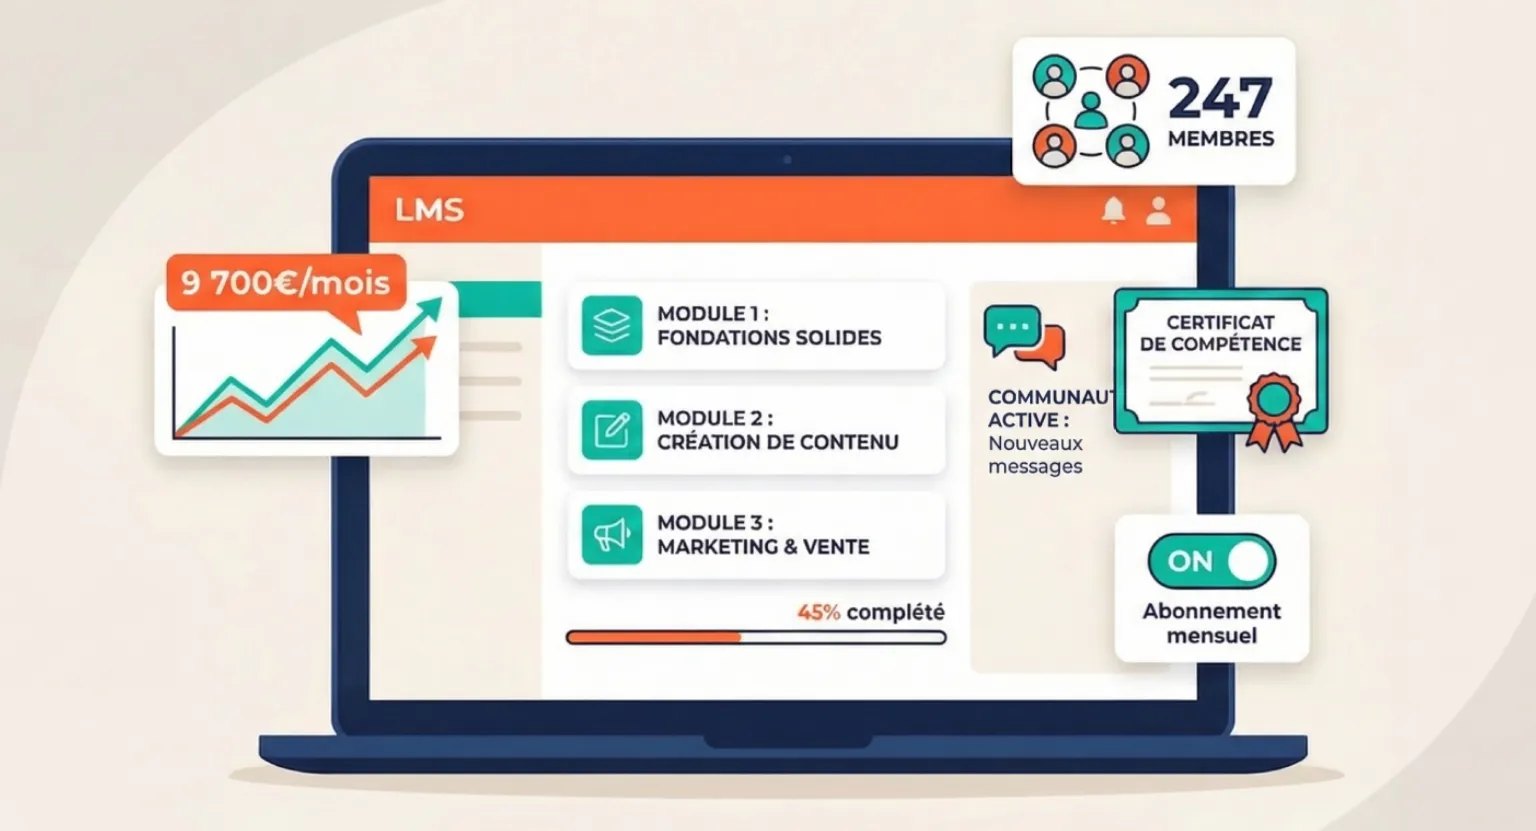
When you're ready to share your work with the world, you need more than just a video player. You need an ecosystem that supports your students.
That's where LearnyBox comes in. You can easily sell online courses by uploading your videos directly to a platform that handles the payments, the student logins, and the community aspect all in one place.
Don't waste weeks trying to duct-tape five different plugins together. Focus on your content and let a dedicated LMS handle the heavy lifting. This allows you to scale without the technical headaches that usually plague creators as they grow.
Finally, remember to export your videos in the right format. While 4K is nice, most platforms compress it anyway. 1080p with a high bitrate is often the "sweet spot" for fast loading times and crisp quality. And always, always export a separate audio-only version.
Many of your students might want to listen to your course like a podcast while they are commuting or at the gym. Offering "multi-modal" learning - video, audio, and PDF transcripts - is how you provide true value in a competitive 2026 market.
It's about being where your students are, in the way they want to consume your brilliance.
So, there you have it. Recording a course isn't about having a Hollywood studio; it's about clear communication, decent audio, and a genuine desire to help your students win.
The tools of 2026 are here to support you, but the heart of the course is still you.
Don't overthink the tech to the point of paralysis.
Set up your space, check your levels, and start sharing what you know. The world is waiting for your unique perspective, and there has never been a better time to build your legacy in the digital world.
Go hit that record button!
Frequently Asked Questions
Do I really need a 4K camera to record my course?
While 4K is the standard for high-end productions, it isn't strictly necessary for a successful course.
Most students consume content in 1080p, so if you have a great 1080p mirrorless camera or a high-end smartphone, focus on that.
What matters more than the resolution is the lighting and the lens quality. Crisp, well-lit 1080p footage looks much better than grainy, poorly lit 4K footage every single time.
Check out our guide on essential recording gear for more details on where to spend your money wisely.
How do I overcome my fear of being on camera?
The "camera-shy" feeling is totally normal, even for seasoned pros. The best trick is to stop thinking about "the internet" and start thinking about one specific person you want to help.
Put a photo of a friend or a former student right next to the camera lens. Talk to them.
Also, remember that you don't have to be perfect. In 2026, students actually prefer creators who are a bit "unpolished" because it feels more authentic and less like a corporate training video.
Just start recording; your confidence will grow with every module you finish.
Should I script every word or just wing it?
The sweet spot is usually a "detailed outline." Writing out every single word can make you sound wooden and stiff as you try to remember your lines.
However, "winging it" often leads to rambling and losing the point. Write down your "Hook" (the intro), your main "Key Points," and your "Call to Action" at the end.
Use bullet points for the middle section. This gives you a roadmap to follow while allowing your natural personality and expertise to flow through your speech.
It's the best way to keep your energy high and your content concise.
How long should my individual course videos be?
The trend for 2026 is definitely shorter, "snackable" content. Aim for 5 to 10 minutes per lesson.
If a topic is complex, break it into "Part 1" and "Part 2" rather than making a 30-minute marathon video.
Shorter videos give students a sense of accomplishment as they check off lessons quickly, which releases dopamine and keeps them motivated to finish the entire course. It also makes your course much easier to update later if a small piece of information changes.
What is the best software for recording my screen?
There are many great options depending on your operating system. For Mac users, ScreenFlow is a classic, while Camtasia is a powerhouse for both Mac and Windows.
If you're on a budget, OBS Studio is free and incredibly powerful, though it has a bit of a learning curve.
The key is to find software that allows you to record your screen and your webcam simultaneously as separate tracks. This gives you the most flexibility during the editing phase to switch between your face and your slides whenever you need to emphasize a point.


 How Long Should an Online Course Be? (2026 Guide for Experts)
 2026 Online Course Pricing Strategy: The Expert Expert Guide to Premium Profits
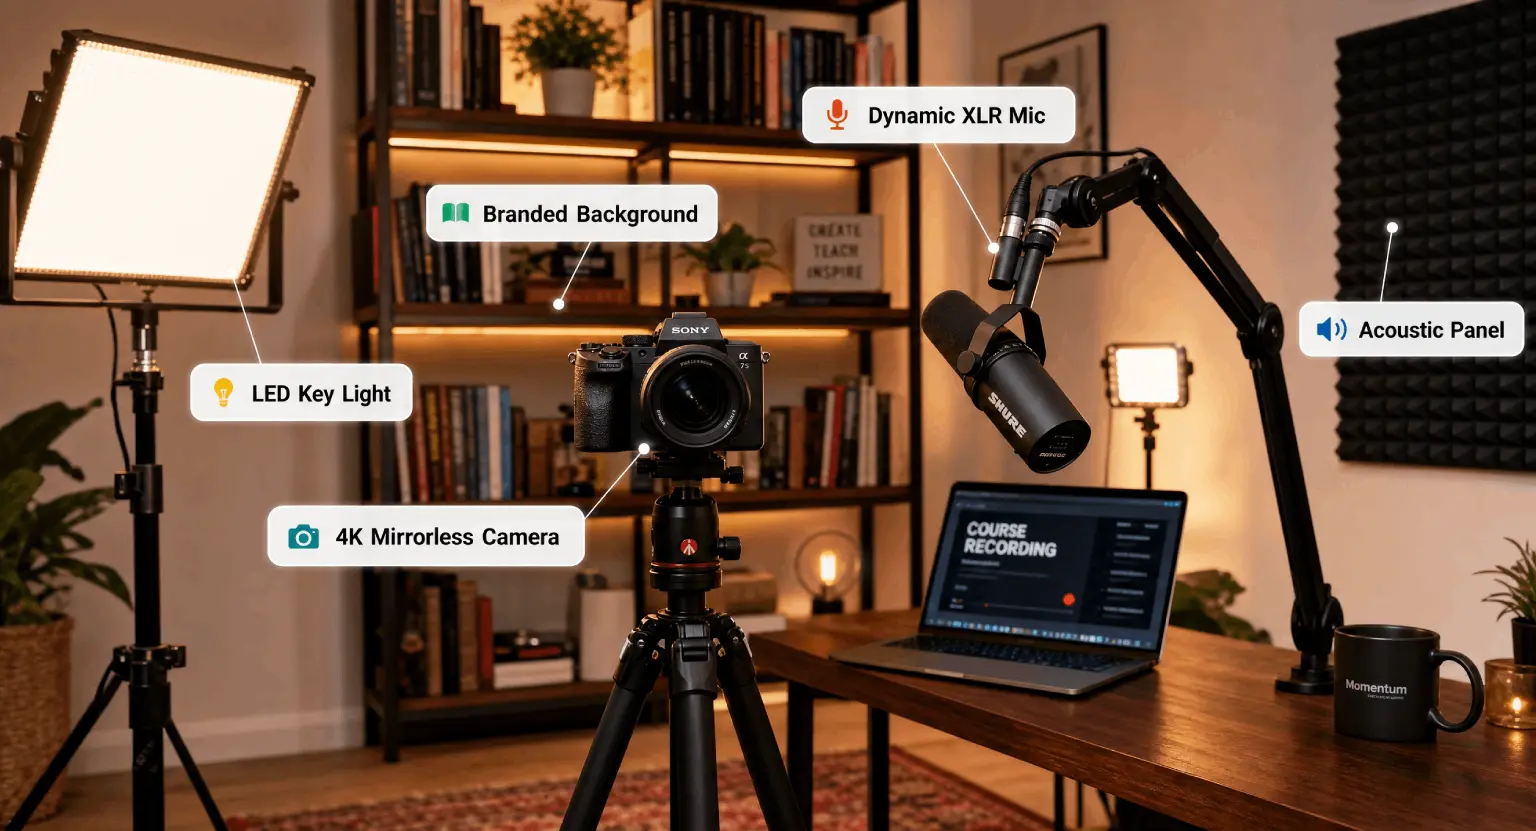 Best Equipment for Recording Online Courses (2026 Expert Guide)
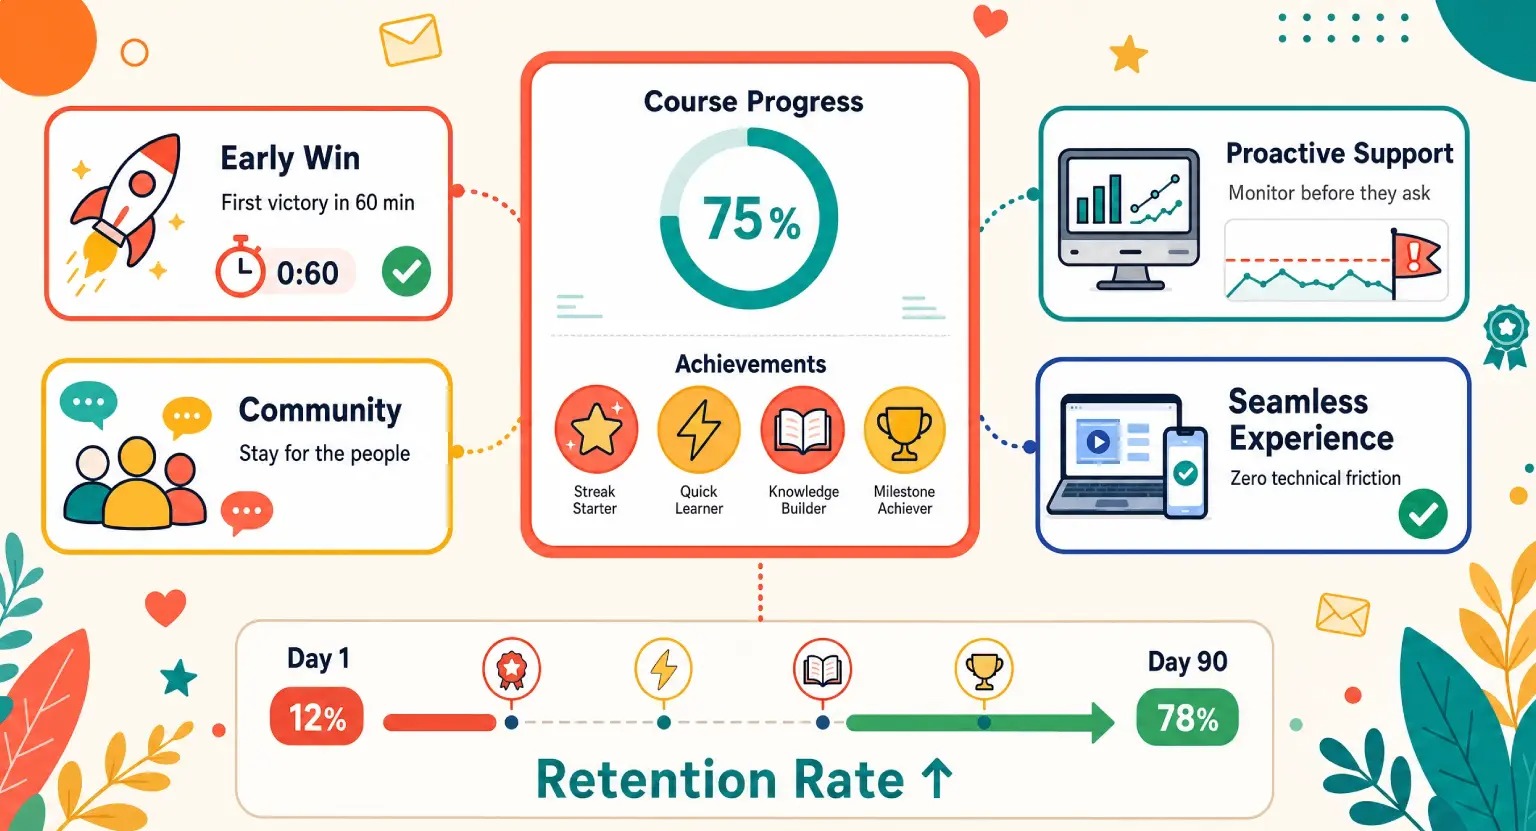 How to Retain Students after Purchase